I've gotten many questions about corsets over the past few years, so I put together a video to help those of you who want a burlesque look make wise choices based on your intentions for the garment. I give some simple tips to recognize a well-constructed
corset, and recommendations on how to select and utilize an off-the-rack
corset or corset-like garment.
Enjoy and share the love.
Showing posts with label cosplay. Show all posts
Showing posts with label cosplay. Show all posts
Tuesday, October 7, 2014


Saturday, November 2, 2013
Topless Vlog #37
Vlog is here!
I shows off my Rainbow Dash cosplay that won third place in a Halloween costume contest. (Okay, I show off the dressed down version.)
LINKS:
11/15 Maxine's show
11/15 Silver Fox Lounge show
I shows off my Rainbow Dash cosplay that won third place in a Halloween costume contest. (Okay, I show off the dressed down version.)
LINKS:
11/15 Maxine's show
11/15 Silver Fox Lounge show
Saturday, June 29, 2013
My Final Reveal: Mr. Snapper Edition part 2
(Guest post by Mr. Snapper.)
I purchased the “Caped Crime Fighter” pattern from Williams Studio 2. This includes professionally drafted and printed patterns for the trunks, cowl cover, and cape; and templates for the Bat symbol, utility belt, belt buckle, and glove. Well worth the $34.99 plus shipping! The pattern pieces come in one size: Adam West. You see, these things are drafted directly from an original on-screen costume. As it turns out, Adam West circa 1966 and I share the same waist size.
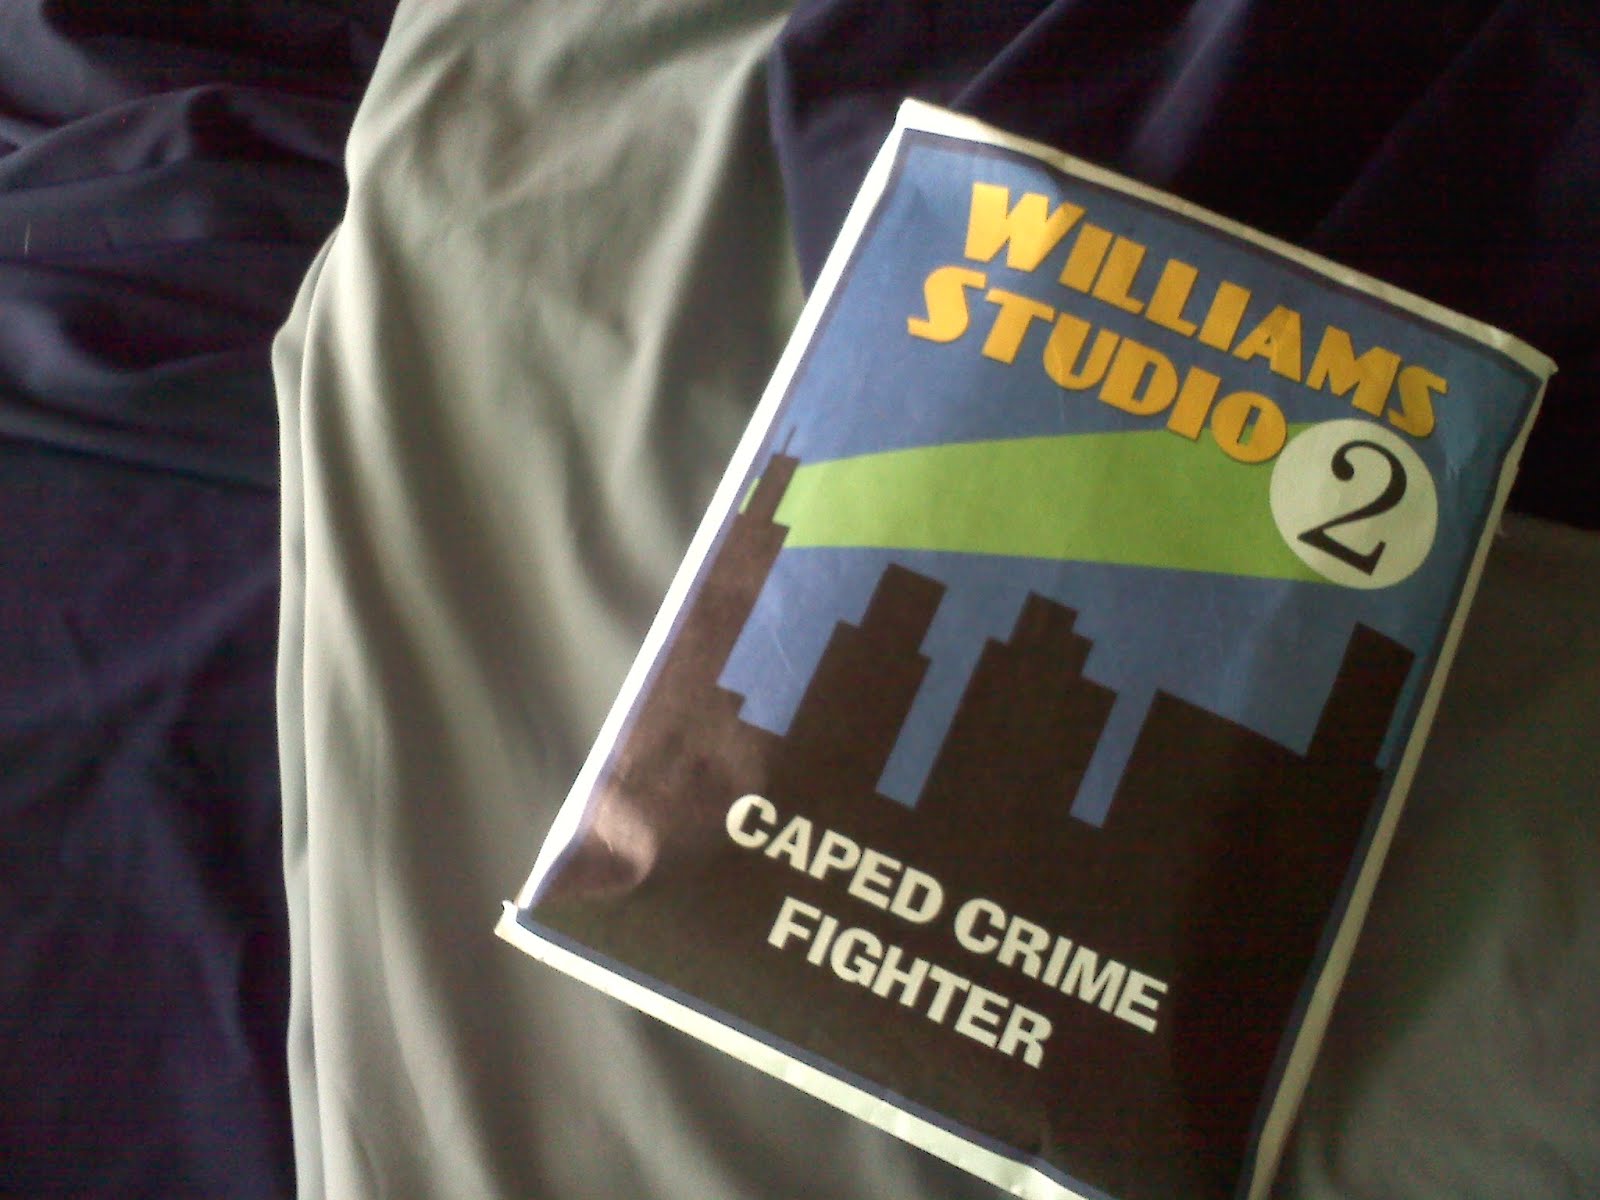
Red picked up my trunk fabric from Levine’s, a heavyweight nylon spandex. I haven’t cut the pieces yet, but it’s ready to go.
Today I ordered the patterns for the tights and the leotard. Per Chuck Williams’ recommendation on the Batman 1966 message board, I went with Kwik Sew patterns 1727 and 3502. We went downtown and picked up a microfiber cotton (or perhaps polycotton) spandex in the RIGHT SHADE OF GREY. See, On Stage Dancewear? It does exist. The tights fabric came from Blue Moon Fabric on 9th Street, a place Evie Lovelle introduced to Red.
I returned the On Stage tights and leotard for a full refund. I should get that money back next week. Jerks.
Tomorrow, I pick up boots and the bits and pieces I need for the utility belt. So today’s tally doesn’t include that.
Total spent to date: $223.14 (but that includes the $109 fucking that On Stage Dancewear gave me. That should be refunded by the next time I blog) and approx. 2:30
Thursday, June 20, 2013
My Final Reveal: Mr. Snapper Edition
(Guest post by Mr. Snapper.)
This past Saturday night, while Red was shaking her ass at the Time Traveller’s ball in Dallas, Mr. Buddy and I were hosting the third staging of Yadi Presents Gotham Girls Burlesque. This particular outing was at the Yost theater in charming Santa Ana, before a crowd of 600 people.
This past Saturday night, while Red was shaking her ass at the Time Traveller’s ball in Dallas, Mr. Buddy and I were hosting the third staging of Yadi Presents Gotham Girls Burlesque. This particular outing was at the Yost theater in charming Santa Ana, before a crowd of 600 people.
When
Yadi asked me to co-host as Batman, she offered to provide the costume.
That was very cool, and I greatly appreciate that she did that for me. I
want to make sure that I say that, because I’m afraid the rest of this
series might come off as ungrateful or dickish. I may be a dick, but I
am a grateful dick.
The costume is an off-the-rack halloween costume:
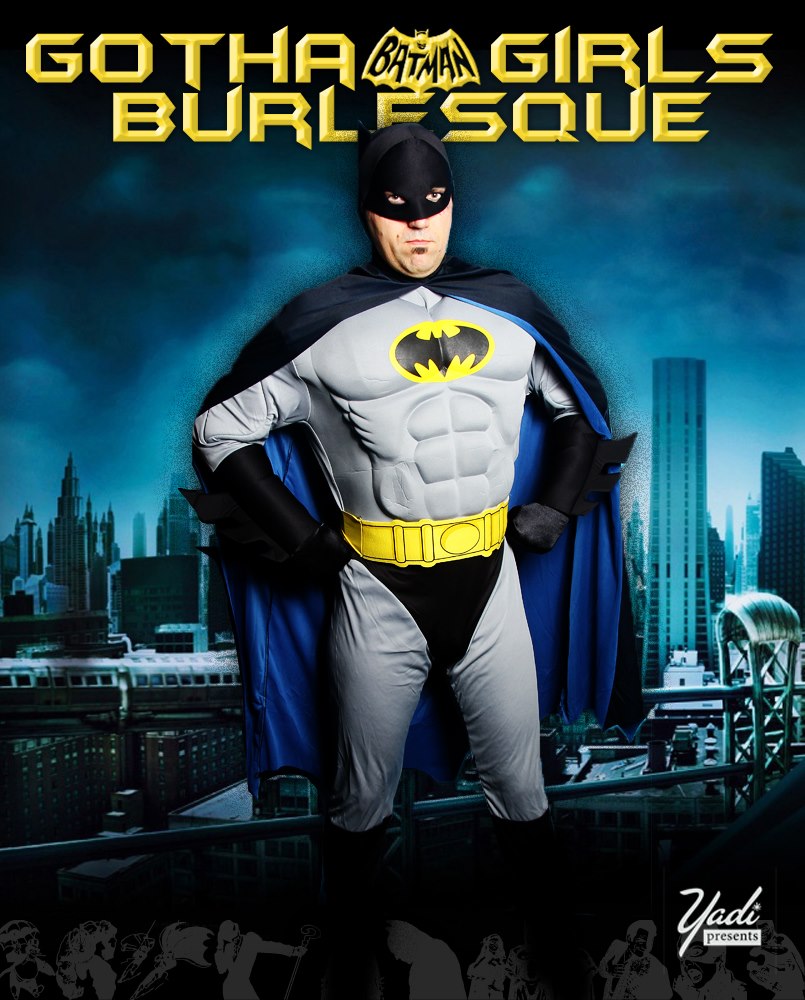
Serviceable. For the first few shows, perfectly fine! But here’s the catch: we’re doing this show in San Diego during Comic-Con. Without a doubt there will be someone in the audience who has poured their heart and soul into recreating a Batman costume. Maybe the functional Christopher Nolan version, maybe the nipple-tastic Joel Schumacher abomination; perhaps the most stylish take on the Caped Crusdader ever, the classic, 1966 Adam West Batsuit.
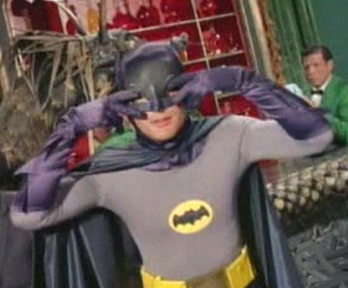
I cannot stand up in front of hardcore cosplayers in an off-the-rack halloween costume. That would be like wearing jean cut-offs to the Oscars.
Since I’m taking my inspiration to build a better Bat from the cosplay community, what better place to start? Right away I discovered the 1966 Batman Message Board. The path to my goal is well taped. Lynne and Chuck Williams in particular have done a significant part of that taping!
I’m starting with the tights. Before I had dug too deeply into the message board, I was looking at zentai-style body suits. Yeah. Not it. Too shiny, too … snug. From the message board I discovered the best approach is a leotard/tights combination. For one, I will have an easier time going to the bathroom. For two, the lines are better.
On one of the boards I found a suggestion to purchase the needed tights from a company in New York called On Stage Dancewear. They can make it in supplex, a nylon/lycra micro fiber fabric with a matte finish. And look at one of the colors they offer it in:

Say! That’s a pretty good Batman grey, wouldn’t you say? The leotard and tights were a custom order, which meant a wait of two weeks and spending more money than I’m comfortable spending on this sort of thing: $109. But hey, the tights will be perfect, and I can get to work on the far more difficult aspects of this costume.
The tights arrived in the mail yesterday:

They seem rather … charcoal, wouldn’t you agree? For the above picture, I laid the unpacked tights on top of the Halloween costume. This should give you a better idea of just how much On Stage Dancewear fucked me.
I called them today, and pointed out that the color preview online is WILDLY different from what they actually sent me. The fellow I spoke to assured me that the supplex grey is the dark-as-the-pit-of-hell charcoal grey. Oops. And the only grey fabric they have that comes close to what they advertise as “grey” is in good ol’ shiny spandex. A color called “silver,” which sort of drives home just how shiny that fabric is bound to be.
They are willing to refund or exchange. The least they can do, really, seeing as how they fucked me. In order to work the exchange for shiny spandex tights, I have two options:
1. Return the charcoal grey leotard/tights for a full refund. At the same time place a new order for the leotard/tights in Spandex. This most likely will be charged to me at the time of order, which means I’m out even more money immediately.
2. Return the charcoal grey leotard/tights for exchange. They won't start making the new ones until the old ones arrive and are processed, 4 or 5 days. Add one more week to the whole process.
I ask if there’s anything they can do for me, seeing as how they fucked me. Nope. If I do option 2, they will have time to send me a swatch of silver spandex. Any chance they will do that, so I can ensure no further fucking occur? Nope. Will they at least buy me a bagel before fucking me? Who am I kidding.
Great. Pleasure doing business with you.
Morose, I dig further into the forums. I discover that Kwik Sew patterns exist for the tights and leotard. Red’s good friend and fellow burlesquer Evie Lovelle knows of a couple of places where I can purchase the right fabric in the correct color. I have decided that this is the path I will take, as I can most likely put this together in half the time it will take On Stage Dancewear to fuck me again. As for them, they can kindly return my money.
Next time … Will Mr. Snapper haggle for a good price on fabric?
Will he manage to sew his own tights?
Will he begin to panic about the incredible chore that
awaits him when it comes time to make a Bat cowl?
Tune in next week to find out! Same Snapper Time, same Snapper Channel!
Total spent to date: $109 and way more time than any reasonable human being should spend on the phone to New York explaining how what was promised was not what was delivered, and being told that there was basically no way to resolve the issue without fucking him further.
Tuesday, May 21, 2013
My Final Reveal: It Is Finished
 |
| Cell phone pic courtesy Mr. Snapper |
Total spent to date: $224.05 and 46:30.
I learned a lot during this process, as I always do when I take on a new challenge. I'm glad I had the unembellished garments done as early in the process as possible so I could choreograph with the actual garments. I'm glad I experimented with even more texture: appliques with fabric paint, beading and rhinestones. I used cheap non-skid pads on the shoes and they kept slipping out of place, so I know now to spend more than a dollar on my non-skid pads. Once again I realized it takes a very short amount of time to build the garments and way longer to embellish them.
The next "Final Reveal" series may just be guest posts from Mr. Snapper as he puts together a new Batman costume for the burlesque show he's doing in San Diego for Comic-Con. While it's not going to be a striptease costume, it will still require the same problem solving skills and wise budgeting that any costume does.
Sunday, May 12, 2013
My Final Reveal: Last Looks
 |
| Happy marker trails on my panties |
I had an interesting time figuring out what to do on the pasties and panties. I decided to take the doodle & flower motif from the applique trim and do it in rhinestones and fabric paint. In order to have an even distribution of doodles and flowers, I used my water-soluble marking pen to determine the placement of the flowers first. I painted the flowers and thought about how I would address the rest of the design while the paint dried. I penned in the doodles then began rhinestoning. Once all the glue was dry, I rinsed the marker out of the pasties. I used the same motif on the panties, painting the bases with floral spray paint first.
All that remains is adding a few stones to the top of the bra and putting bows on the shoes. Whew!
Total spent to date: $218.07 and 44:30.
Wednesday, May 8, 2013
My Final Reveal: Down Time

Today I dealt with the problem of my loose shoes. I cut two pieces of felt-backed lingerie elastic and glued each inside a shoe. They're pulled a little tight so they hold the shoes in place. I hot glued the elastic on each side, then touched up the middle so I don't slip my foot through the elastic when I put the shoes back on in my choreography. With my heel cushions sitting in the back of the shoe, I did a fitting. I then applied the adhesive heel cushions when I knew the fit was good. I'm going to cover the elastic with a couple more bows when I pick them up.
I attached the clip to the back of the frouffy bow and put rhinestones on the flower. I still have to drop a seam in the elastic that will hold the flower. That will finish up the hair accessories. Today's projects took about thirty minutes.
Total spent to date: $218.07 and 39:30.
Sunday, May 5, 2013
My Final Reveal: Strides & Speed Bumps

In the top of the photo, you can see the trim on the edge of the robe's bodice. I originally intended to fully encrust the trim with stones, then I realized that many stones would significantly alter the weight of the robe. I decided to make it less sparkly so the garment would maintain its shape and wouldn't be much heavier. I used the rest of my leftover 16ss sun AB stock to start the inner edge of the curve. I had some leftover 30ss padparadscha that I used on the outer curve. I ran out of both and hit the rhinestone store early yesterday morning.
This was my first speed bump. I could easily get the sun AB and the light rose AB I used on the top curve of the bra appliques, but the stores I hit were all out of padparadscha in the size I needed. At one of the stores I was asked why I wanted to use such an unpopular color. I was a little dumbstruck by the question. It can't be that uncommon, can it? And why would I want to use the most popular rhinestone color? I'm not the girl who wears black and red costumes, so I'm not the girl who's going to stock up on the most popular rhinestone colors. I spent $46.77 in stores and another $12.50 on the internet so I'd have the stones in time to finish the collar before the May 20th debut. I did pick up some 16ss padparadscha that I used to pop the appliques a bit more.
I picked up a couple coral bows from the wedding section of a craft store for possible use on the costume. I can't decide if I want to put one in the center of the bra or not. That was an additional $5.98. I'm probably going to put the bows on the backs of my shoes, which means I'll buy a couple more bows if I want to put one on the bra. The wedding section is fantastic for merch packaging, sparkly accessories, and clever embellishments.
My second speed bump is my shoes. The silhouette is perfect, but the fit isn't ideal. They're a bit loose in the heel. I spent $9.55 on heel grips, pads for the ball of the toe, and traction stickers for the soles. I have a little more to do with them in hopes I can get them to work. It's tricky to buy shoes over the internet. I wish I'd tried on this brand in a store beforehand so I'd know how the brand fit my foot so I could order a smaller size (if it would fit).
My rhinestone shopping was more efficient than ever. I measured each surface that needed to be covered, then divided that number by the size of rhinestones I wanted to use. If you try this technique, I recommend measuring in centimeters; you can find the diameter of individual stones in terms of millimeters. I have few leftovers from my project.
Total spent to date: $218.07 and 38:30.
Tuesday, March 26, 2013
My Final Reveal: Office Work
Yesterday I managed to squeeze in an hour around lunch and down time to cut the robe. I love the way English net looks and drapes, but I don't love how difficult it can be to cut and hand sew. It's very slippery.
And yes, I am the jerk who actually cuts vintage pattern pieces so they can be used instead of tracing them and reselling the pattern.
Total spent so far: $38 and 4:30

Topless Vlog #24
Topless vlog is here!
Buster tries to cause an earthquake with his ball as Red (the disheveled showgirl) talks about costume projects and upcoming shows.
LINKS:
DIY pearl costume
Friday Night Happy Hour
Bachelor Pad Magazine
Buster tries to cause an earthquake with his ball as Red (the disheveled showgirl) talks about costume projects and upcoming shows.
LINKS:
DIY pearl costume
Friday Night Happy Hour
Bachelor Pad Magazine
Saturday, March 23, 2013
Cinema Secrets Savings

Today I used my Groupon on the following:
- Super Sealer so I can give my stage makeup some light sealant $10
- Concealer palette to hide those bags from lack of sleep, blotches from allergies, and bruises from Buster $24
- Ultimate Eye Liner pencil for Mr. Snapper $2
- Ultimate Blush in a very cheery color $11
- Hollywood Lights Loose Pearl Powder to highlight my brow bone $8
(Cinema Secrets is currently having a sale of 50% off costumes, wigs, and Halloween stuff. Now's your chance to get a discount Leg Avenue costume.)
Saturday, March 2, 2013
DIY Crazy Horse - Josephine Baker Pearl Costume


To build the pearl chorus costume, you will need:
- a flesh-toned thong or G-string
- a flesh-toned bra
- 2 yards of 5/8"-1" wide flesh-toned elastic
- 20+ yards of pearl garland
- a large metal snap
- flesh-toned thread
- a needle
- a thimble (trust me on this one)
- a pants hook and bar
- a swimsuit hook
- 1 gross rhinestones and 5 gross pearl studs (optional - most of the pearls I got were used on the pasties)
 |
| Pearl garland - 22 yds. per roll |
Prep the bra for embellishment by clipping off the straps. Measure for your halter strap. (I estimated 18" per costume, but your measurements may vary.) Machine stitch or hand stitch one end of the strap to the top of one cup where you clipped off the old strap. (If you use lingerie elastic, make sure the plush side will face your body.) Turn under 1/4" of the other end and finish it so it doesn't fray. Attach the male side of your snap to the finished edge of the strap so it will face the bra. Make sure your strap isn't twisted before attaching the snap to save yourself a headache. Attach the female side of the snap just inside the top of the free cup. Be sure everything fastens correctly before adding any embellishments.
For stripping ease, replace the bra hooks with a pants hook and bar. You can leave the factory hooks and eyes on the bra and attach the pants hook and bar over them. You may consider taking jewelry pliers to bend the factory bra hooks closed so they don't catch on fishnets when you remove the bra.
 |
| Where to start & round the edges |
 |
| Hand stitch garland across center of cup |
 | ||
| Follow the arrows from the X |
 |
| Note the strap, the snap, and 7 rows of beads |
 |
| Clarus stones & plastic pearl studs |
I finished off the bra by using Clarus (very inexpensive Korean) rhinestones between the rows of pearls, and alternating the rhinestones with pearl studs on the wings and strap of the bra. I needed a little more dimension and a little more pop for the costumes I made since they were going to appear in a film.
 |
| Loose garland on front |
 |
| Thong center back |
I used spare Clarus rhinestones and faux pearl studs to embellish the rest of the thong. I didn't embellish the crotch or the crack of the thong because the pearl garland was embellishment enough for what the audience would see in the number.
If you got the 20+ yards of pearl garland, you should still have some left. You can use the remaining supplies to make a sexy choker.
 |
| Swimsuit hook & lingerie elastic |
Stitch a length of garland from one seam of the collar to the other. Don't tighten your hand stitches too much or the collar won't fit. Try the collar on to be sure it fits, then cut the garland.
 |
| Notice the center of the collar |
You can use the remaining garland to add more swags to the bra, panties, or collar.
 |
| Cheap plastic pearl studs |
I'll share photos of all the ladies in these chorus costumes from the film shoot. Please feel free to contact me with questions if you try to make these costumes, and I'd love to see photos.
Wednesday, January 9, 2013
How to Rhinestone an Emblem
This is for those of you who haven't developed a reliable rhinestone technique, particularly those of you who are new to rhinestoning.
A few guidelines:
 This is my project. I embellished this Batman patch for Mr. Snapper's underpants for a show. I used 10ss citrine and jet Preciosa rhinestones because: 1) they were small enough to fit in the corners of the symbol and help it maintain its lines when fully rhinestoned; and 2) they're cheaper than larger stones and other brands. These are just below Swarovskis in quality and above Clarus and plastic stones. I have my Gem-Tac and my toothpick for gluing.
To apply each stone, put a tiny pool of glue on a scrap of paper. Pour a small amount of stones onto your worktable or into a dish, flipping the foil side up to make the process easier. Dab a tiny bit of glue onto the tip of the toothpick. Use that dab of glue to lift a single rhinestone. Slide that rhinestone gently onto the surface of your project.
For symbols and pasties, I recommend you do all outlines first and fill in the rest later. You can see with the Bat symbol that I started lining the edges of the yellow section before filling them in. It's much easier to leave tiny gaps in the middle and have them go unnoticed than to cram in so many stones that your edges are janky.
If you get wet glue on the top (exposed glass edge) of the rhinestone, try scraping off the excess with the clean edge of your toothpick or stir stick. If that doesn't work, dampen the end of a cotton swap with a very tiny amount of rubbing alcohol. Gently buff the top of the rhinestone with the swap until the glue is gone.
Here's the completed version:

A few guidelines:
- Use varying quality of stones on larger projects. Your largest stones should be the highest quality because they'll catch the most light. Scrimp on the spending with the smaller stones. It's okay to use cheap glass or plastic stones as filler when you're covering a large area.
- Use the least toxic glue you can. Highly toxic cements like E-6000 and Bond 527 might dry quickly, but you need to open a window when working with these cements and watch for potential allergic reaction. Glue like Gem-Tac and Jewel-It aren't as toxic but require a longer drying time. There is a special hot glue for embellishments, but you'll probably want a hot glue gun dedicated to that glue to maintain its integrity.
- Toothpicks or stir sticks are great embellishment tools. You can also use wax sticks from jewelry stores. I've had to rhinestone with my fingers alone, but that doesn't work so well on small stones.

To apply each stone, put a tiny pool of glue on a scrap of paper. Pour a small amount of stones onto your worktable or into a dish, flipping the foil side up to make the process easier. Dab a tiny bit of glue onto the tip of the toothpick. Use that dab of glue to lift a single rhinestone. Slide that rhinestone gently onto the surface of your project.
For symbols and pasties, I recommend you do all outlines first and fill in the rest later. You can see with the Bat symbol that I started lining the edges of the yellow section before filling them in. It's much easier to leave tiny gaps in the middle and have them go unnoticed than to cram in so many stones that your edges are janky.
If you get wet glue on the top (exposed glass edge) of the rhinestone, try scraping off the excess with the clean edge of your toothpick or stir stick. If that doesn't work, dampen the end of a cotton swap with a very tiny amount of rubbing alcohol. Gently buff the top of the rhinestone with the swap until the glue is gone.
Here's the completed version:

If you have rhinestoning questions or concerns, let me know. I'm happy to share what I've learned.
Sunday, October 21, 2012
How to Make Pasties - Math Is Hard
Tuesday, October 16, 2012
The Honey Boo Boo Project
Just over three weeks ago, I got an opportunity to make a Honey Boo Boo cosplay/Halloween costume for the daughter of Missy of Miss Missy's Photography. You can see what I made.
This is the main photo I referenced. I was trying to capture the silhouette and colors, but I had to make sure the costume was cost efficient. I had to get the silver trim, the triangle on the belly, and the lettuce edge ruffle.
To get the silhouette, I used a bustier pattern and drafted the skirt to attach to the bottom of the bustier. I spent a lot of time working on the ruffle, but the ruffle is the key feature of the silhouette. Without that ruffle, her costume might not be easily recognized.
Knowing this was going to be a Halloween costume and working to keep costs down, I used some very thin fabric for the ruffles and shell of the dress. This gave me some challenges because it would shift while I was cutting and while I was sewing. I did a lot of basting to keep things in place for machine sewing on this costume. I also took my time because I knew from the first stitch that my fabric would challenge me.
The fabric was so thin that I had challenges installing the zipper. I wanted the costume to be durable (even though it was made for Halloween), so I sandwiched the zipper in bias tape and attached the bias tape to the shell and lining. The final product won't split at the zipper because of the bias tape solution.
I had some leftover appliques so I made a hair clip to match the dress. I passed the leftover trim, appliques and rhinestones to the client to embellish a bag for Halloween, or to use on any accessories.
Even though the shell fabric was a challenge to use, I'm very pleased with the outcome. Lacey wears the dress very well and looks pleased with the project.
 |
| Honey Boo Boo |
This is the main photo I referenced. I was trying to capture the silhouette and colors, but I had to make sure the costume was cost efficient. I had to get the silver trim, the triangle on the belly, and the lettuce edge ruffle.
To get the silhouette, I used a bustier pattern and drafted the skirt to attach to the bottom of the bustier. I spent a lot of time working on the ruffle, but the ruffle is the key feature of the silhouette. Without that ruffle, her costume might not be easily recognized.
 |
| HBB with Lacey in the Honey Boo Boo costume I made |
The fabric was so thin that I had challenges installing the zipper. I wanted the costume to be durable (even though it was made for Halloween), so I sandwiched the zipper in bias tape and attached the bias tape to the shell and lining. The final product won't split at the zipper because of the bias tape solution.
I had some leftover appliques so I made a hair clip to match the dress. I passed the leftover trim, appliques and rhinestones to the client to embellish a bag for Halloween, or to use on any accessories.
Even though the shell fabric was a challenge to use, I'm very pleased with the outcome. Lacey wears the dress very well and looks pleased with the project.
Saturday, September 22, 2012
Holy Shopping, Batman!
At last weekend's cosplay panel at Comikaze, they mentioned the wonders of Burlington Coat Factory for off-the-rack pieces that work really well for costumes. Mr. Snapper took note of their recommendation and looked it up on Yelp, discovering we have a BCF in Burbank. When he read one Yelper's review that BCF is what you would expect Nordstrom Rack to be (great stuff for low prices), he decided we should go there instead of Goodwill to start our shopping for Mister Rogers.
 I had to find a blouse for my Shari Lewis costume, and I've become a bit of a tightwad. I found the cream-colored blouse in the photo for a whopping $6. (I don't anticipate doing this number hundreds of times, so I didn't want to make a huge investment in something I wouldn't wear outside of the show.) And because I could, I spent $10 on a wonderful melon-colored sweater.
Mr. Snapper found a fantastic, non-wool cardigan for cheap. He found khaki pants for $15 and a blue shirt for the same. He also found a wonderful orange Tommy Hilfiger necktie with tiny fishes on it. (I bought him a yellow Tommy Hilfiger tie with tiny turtles on it a few years ago; they look a bit like paisleys from a distance.) He also splurged on a $7 bowtie.
I did some browsing and they do have quite a coat selection. It's like a clean Ross or Marshalls, or like an affordable Nordstrom Rack. We spent $80 for everything in the photo.

Mr. Snapper found a fantastic, non-wool cardigan for cheap. He found khaki pants for $15 and a blue shirt for the same. He also found a wonderful orange Tommy Hilfiger necktie with tiny fishes on it. (I bought him a yellow Tommy Hilfiger tie with tiny turtles on it a few years ago; they look a bit like paisleys from a distance.) He also splurged on a $7 bowtie.
I did some browsing and they do have quite a coat selection. It's like a clean Ross or Marshalls, or like an affordable Nordstrom Rack. We spent $80 for everything in the photo.
Tuesday, September 18, 2012
Importance of Sketches

This is the rough design of the costume I'm building for November. I knew what pieces I needed but I had to figure out how they needed to fit together. I also needed to play with the colored pencils to determine what color would work best. I need a rear view so I can figure out how the assels will work best while keeping the panty coverage necessary for some venues.
I did some drawing as a child, but I never managed to quickly whip out figures. This was a handicap when I started designing because I was so worried about having correct figures what I would stall on the actual costume design. That's when I learned about the joy of croquis.
Back in the olden days of the nineties, I had to rely on pattern books that were out of season and negotiated for at the local Wal-Mart. When I was really desperate, I'd use the measurement sheets from the costume shop. (They were a bit rough looking.) Nowadays, some patterns include croquis (particularly the Simplicity Project Runway patterns). The amazing internet has croquis galore. I've used a few from this site.
By sitting down and sketching with croquis, I now know what exactly I have to build. I know what color fabric to find and how the pieces need to fit together. Stay tuned and I'll share as I build.
Monday, September 17, 2012
Comikaze: Cosplay Construction 101 Review
On Saturday I attended Cosplay Construction 101 at Comikaze. I'm not a traditional cosplayer (I didn't even know what that was until a couple years ago), but I thought some of what they had to say might translate well to burlesque. The panel was Chris White, Avery Faeth, Vensy, and April Buyer.
Here are some highlights:
Here are some highlights:
- There are YouTube video tutorials for making specific character costumes. In the cosplay culture, it's totally cool to use other people's technique and style to build a cosplay (which I would just call a complete costume, but when in Rome). In burlesque, you just don't make a carbon copy of someone else's costume; it's considered ripping off an idea to us. (Lots of burlesque costumers will share techniques, but they don't take kindly to someone making a duplicate costume and trying to take their gigs.) In cosplay, they're paying tribute to characters someone else created and put into the world, so they don't seem to mind sharing the best way to make a Stormtrooper costume, for example.
- In cosplay (or burlesque), don't skip steps. When you skip steps, the shoddy work can and will impede later construction. If you do it wrong the first time, redo the right way.
- Don't save the difficult stuff for last because it winds up looking crappy or being really uncomfortable. (Who hasn't done this? Seriously.)
- Work out the 3D version of your 2D character so you can figure out what can realistically be done with the costume. Mr. Snapper does this with props, which is how our Mr. Toad car turned out so awesome.
- Before investing in a new piece of equipment, make a list of the projects you want to do with that new equipment to justify the expense. When Mr. Snapper and I invest in any kind of new equipment (like a rotary cutter and cutting pad, a cordless drill, or a second sewing machine), we think about how much we'll use the new stuff, how much time and energy we'll save.
- If you're significantly altering the shape of a wig, buy wefts of hair to thread into the lace of the wig so you're not inconveniently bare in exposed places. Extreme wig shapes can be achieved with a sturdy glue.
- Build your shoes off of inexpensive & comfortable shoes from discount stores. (I have my own opinions on this, but I'm also not walking around in my burlesque shoes at a convention for twelve hours a day.)
- Consider how long you'll spend in your costume. Make things lightweight, and consider the footprint of your cosplay; will you spend the entire day running into people because you can't see or taking up half an aisle with your outfit?
- Be careful when purchasing something from overseas. The wig/fabric/prop/costume may be totally different from the picture, leaving you scrambling at the last minute to get what you need and spending more on a local supplier. (Remember my lovely green taffeta and how I now have a sheer dress because the Chinese supplier didn't represent it accurately in the listing?)
- Start small with your cosplay. Try making inexpensive outfits from craft foam and cardboard before trying to tackle a project that requires resin casts and pattern drafting.
- Arda Wigs. This was one they mentioned in the panel. I popped by the website and the wigs look great and are pretty inexpensive. They also have a lot of zany colors.
- Volpin Props. This was another they mentioned in the panel.
- Foam Mart. They mentioned Foam Mart for rigid foam. In college in Arkansas we were able to get some rigid foam sheeting from our local hardware store. They do have flexible foam at JoAnn Fabrics (subscribe to their mailing list so you know when they have a 50% off foam sale), and at shops in the Fashion District of downtown Los Angeles.
- Wonderflex/Fosshape. They mentioned Wonderflex in the panel for building rigid, shaped pieces. I've never worked with it myself. I know of it from my corset supplier, as they carry Wonderflex and the less expensive Fosshape. Avery gets her Wonderflex from Dazian in North Hollywood, and they also carry Fosshape
- Michael Levine. This is my recommendation. The cosplay hopefuls were being directed to JoAnn Fabrics for supplies. If you live in flyover country and don't have a Fashion District, that's probably the best idea. If you do live in Los Angeles, Michael Levine is like a Wal-Mart for fabric. They have so much stuff and you don't have to negotiate prices. (There are lots of fabric shops around Michael Levine who will haggle. I don't always enjoy the hassle of haggling.)
- Bohemian Crystal. The panel talked about personalizing costumes. Bohemian is a great resource for rhinestones and beads for embellishing.
- Fabulous Feathers. The panelists buy their feathers from craft stores, spending significantly more than necessary. Fabulous Feathers is in Northridge. Jason has been my feather supplier for a few years, and he has a wonderful selection. If you're in downtown LA and you don't want to make the drive, you can check out Mother Plucker and still save on feather purchases. In flyover country, there's a fairly new feather supplier called Fancy Feather in Dallas. (I plan to buy their feather fan hardware to construct my next set of fans.)
Subscribe to:
Posts (Atom)